Skyrim Se Creation Kit How to Upload Mod to Bethesda.net Only for Yourself
I am a huge fan of "The Elderberry Scrolls" series as well every bit all of the other great Bethesda titles.
Learn how to utilise the Skyrim Creation Kit as a beginner!
Canva
Skyrim Creation Kit is the tool that Bethesda used to create Skyrim. Information technology is besides used by modders who make all the wonderful mods that nosotros all dear to use. Mods add and then much to the existing game—they permit u.s. to explore new lands, vesture new article of clothing, wield new weapons, etc. They also set bugs and enhance or completely overhaul gameplay elements.
How to Use the Skyrim Creation Kit
I take taken up modding in Skyrim and thought I would share my experiences, beginner to beginner. There are many excellent guides out in that location, but they are often written by experts who are very familiar with the tool and accept therefore forgotten what it is like to be a beginner. I volition brainstorm at the very outset with:
- How to install the kit
- How to navigate the kit
- How to first creating a modern yourself

Modded "Skyrim" is a cute game, rich with places to discover and creatures to kill. Not to mention the dragons! Learn how to use the Creation Kit to create your ain mods.
Zenimax and Bethesda
How to Install the Skyrim Creation Kit
The get-go step is to install the Cosmos Kit.
Log into Steam and navigate to Library and select Tools
- Curl down to Skyrim Creation Kit, correct-click and select Install Game
Steam will download the Cosmos Kit and add together a curt cut to it on your desktop. Yous are now ready to launch it and start learning how to create mods of your own.
Introduction to the Kit
At present that we have the Creation Kit, open it and you volition see the following:
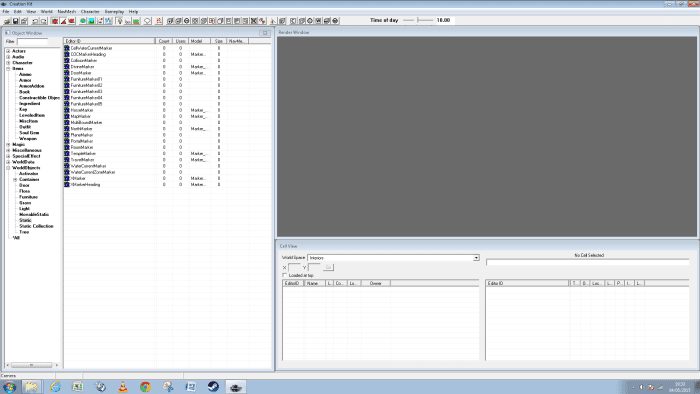
Welcome to the Skyrim Creation Kit, a tool to create wonderful and exciting mods for Skyrim.
http://robbiecwilson.hubpages.com/
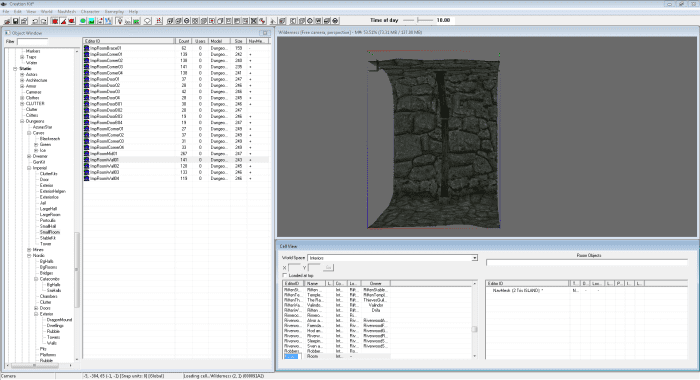
As you tin see, information technology is made up of a number of split up windows chosen views.
- The beginning is the Creation Kit itself, which has the menus and a number of buttons. The majority of these buttons are not needed for a beginner, so we will largely exit these alone at the moment.
- The Object Window is where all the objects that you tin add together to mods are stored. Y'all can run into that the left-hand tree has all of the categories of objects and the right-hand console has the objects that are stored in a category. You volition employ this window a lot while creating mods.
- The Render Window renders your modern so that y'all can meet how it will look in-game. You tin move around inside the window and also zoom in and out (we will comprehend this in more detail shortly).
- The terminal window is the Cell View. This lists all the cells in Skyrim besides as whatever that you create for your mods. This will also listing all the objects that you take added to your mods on the right-hand side.
The Basics of Creating a Simple Skyrim Modern
Now that you have a rudimentary agreement of what all the views do, information technology is fourth dimension to offset creating your first mod. To brainstorm:
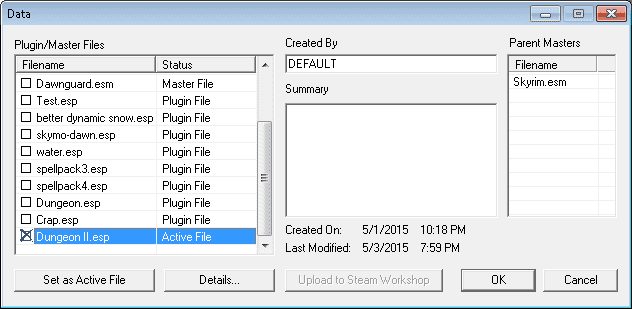
- Click File and and then Data
- Select "Skyrim" and then OK
Curlicue to Go along
Read More From Levelskip
If y'all take already created a modern, the process will be slightly different
- Once once again, select File and Data
- Choose "Skyrim" and your mod
- Double Right Click and the mod'southward condition will change to Agile Plug-in
How to load a modern into the Skyrim Creation Kit.
http://robbiecwilson.hubpages.com/
The Creation Kit will now load the Skyrim.esm file. This may take some time, depending on your system'south speed. You lot will go a warning, click Yeah to all to suppress information technology.
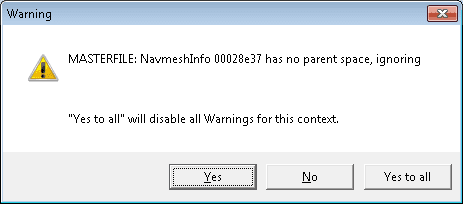
Click "Aye to All" if you receive this warning when opening Skyrim.esm into the Skyrim Creation Kit.
http://robbiecwilson.hubpages.com/
Now that the Cosmos kit has loaded all the objects from the principal Skyrim.esm file, we are going to add an object so that we can practise motility and manipulation of objects in the render window. Merely before we do that, we need to create our own cells for our mod. To practice this:
- Click on the Cell View window and select UnownedCell on the left-hand side

Using the Prison cell View in the Skyrim Creation Kit to indistinguishable a jail cell to be used as a starting betoken for a new modernistic.
http://robbiecwilson.hubpages.com/
- Right-click on it and select Duplicate Jail cell
- UnownedCellDUPLICATE001 * volition appear in the list
- Click on it and rename it. Ensure that the name doesn't comprise any spaces
- Edit it and select Interior Data
- Change the proper noun to something more advisable
- Select all the objects in the correct-hand pane and delete them
Note: yous will have to click on another cell and back onto your new cell to see the changes.
Now that we take an empty cell, it is fourth dimension to add together a new object to it.
Double click on your new cell so that the Creation Kit knows this is where you want the objects to be placed.
- Click on the Object Window and open WorldObjects then Static, followed by Dungeons and finally Imperial and Small Room
- Elevate the object ImpRoomWall01 to the Render Window
The Render Window in the Skyrim Creation Kit allows you to meet what your modernistic volition look like in-game.
http://robbiecwilson.hubpages.com/
How to Move About in the Return Window
The first thing you will need to learn is how to motility around in the Render Window. The controls chosen by Bethesda are unlike from most anything you lot have used before and will take a while to get used to. I advise practising moving around until you lot are used to it before building your first mod. This will salvage you a lot of annoyance later on. To move around the Render Window:
- To move left, correct, upwardly and downwardly (panning), hold down the mouse bicycle and move in the direction you desire.
- Zooming in and out is elementary enough; just utilize the mouse wheel as you do in many other games or applications.
- Finally, to rotate the view, hold down the Shift key and move the mouse.
Once you are totally happy, it is time to move to the next pace, adding more objects into the cell that makes up your mod.
The Snap to Grid and Snap to Angle buttons in the Skyrim Cosmos Kit are required to make connecting objects easier.
http://robbiecwilson.hubpages.com/
How to Add Objects to Your Mod's Jail cell
Now that we are happy moving around in the Render Window, information technology is time to add additional objects to your mod. Before we do this, nosotros need to select two buttons to make connecting the objects together easier. On the Creation Kit, select the 2 buttons shown above; the Snap to Grid and Snap to Angle buttons.
One last proposition which saves a lot of time when you are new to the Cosmos Kit is to utilise the Preview Object Window. To plough this on, go to View and select Preview Window. This will allow you to encounter what an object looks similar without having to drag it into the Return Window and so deciding you don't like it or it is the wrong piece.
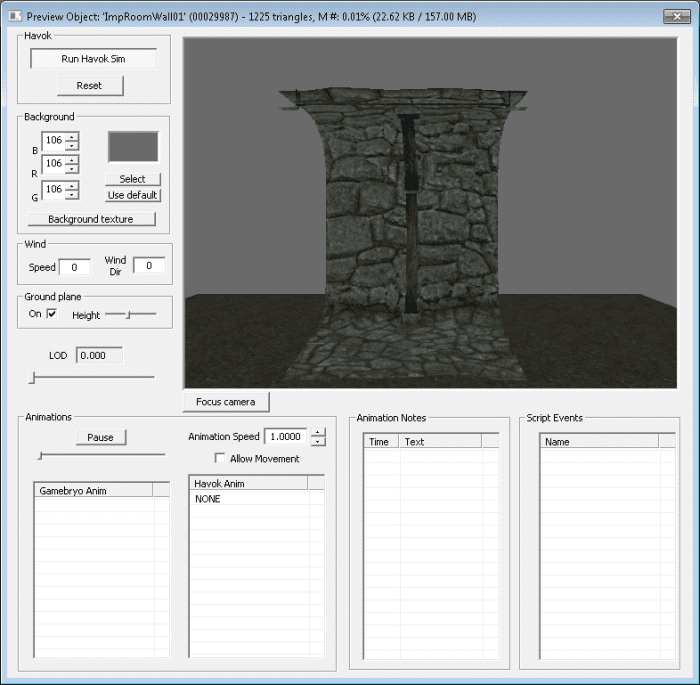
The Preview Object Window in the Skyrim Creation Kit allows you to wait at an object before adding information technology to your mod, saving you a lot of time when selecting objects to utilize.
http://robbiecwilson.hubpages.com/
Adding objects into the jail cell is ane of the trickiest parts to larn. It took me quite a while to get to the point where I was able to exercise this quickly and easily. In that location are in fact two means to practise it, which you cull is upwardly to personal preference. First, I will illustrate the frustration that this tin can cause. Drag NorRmSmWallFront01 into the Return Window. Now, elevate and driblet a 2d one into the window. You tin see how this will look below.
Objects dragged into the Render Window in the Skyrim Creation Kit will often need meaning amounts of manipulation to connect together.
http://robbiecwilson.hubpages.com/
How to Line up Objects
The 2 walls are in totally unlike positions. You could move the pieces and then that they are together, but believe me, that is frustrating and very time-consuming. So my communication to you is to never add together objects like this. It will drive y'all crazy and yous will waste matter a lot of time and energy lining things up. The two methods to add objects then that they are lined up is:
- First, select the first object. Press Command D to duplicate it. Some other object will announced in the Cell View. The second object is on tiptop of the first. You can and then elevate it and click it easily into place adjacent to the starting time wall.
- The 2d method is to drag the object from the Object Window every bit before, but drag information technology on pinnacle of the original object. This method is less accurate than the first and I would recommend using only the first method for now.
How to Replace Objects
Should you want a different object than the beginning (for example a Corner piece), select the duplicate and press Command F. This will allow you to replace the object with another. Go ahead and make your third wall piece NorRmSmCorIn01 .
- To ensure that you have no gaps between the objects, zoom in and out and as well rotate your objects to check for gaps.
- To rotate a piece, simply select it and press and hold the right mouse push. When it is rotated and so that the piece fits, let go of the button.
Add another corner so that yous accept two wall pieces and ii corners similar this.
We have now created the starting time wall of our room using the Skyrim Cosmos Kit.
http://robbiecwilson.hubpages.com/
Duplicate the Wall and Add together the Side Walls
Now, we tin indistinguishable this whole wall to make the other wall of the room. To practise this, elevate a box around information technology by holding downwardly the left mouse button. You lot volition see the option boxes (the blue, green and blood-red lines) displayed for all four pieces.
The selection boxes (with crimson, green and blue lines) bear witness you which object yous accept selected in the Skyrim Creation Kit.
http://robbiecwilson.hubpages.com/
Printing Control D to duplicate them and drag them off to the left. Rotate them then that they look similar mine below.
Now our new room created in the Skyrim Creation Kit has two walls!
http://robbiecwilson.hubpages.com/
Now add two side walls (NorRmSmWallSide01), ane to either terminate using the same method as nosotros did above. Now select the four pieces we created before (either drag a box effectually them or printing Control and select them to create our group once more)
- Drag them until they click into the two wall pieces nosotros only created

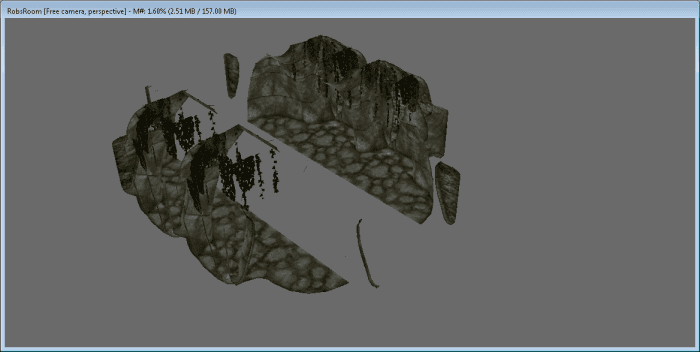
Our new room created in the Skyrim Creation Kit has 4 walls now!
http://robbiecwilson.hubpages.com/
- To fill the room upwards, add two NorRmSmMid01 (floor tiles)
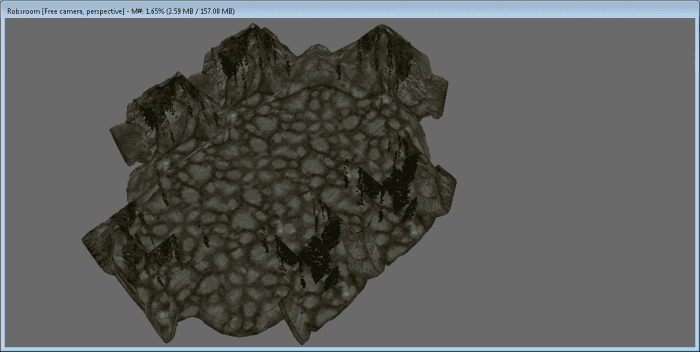
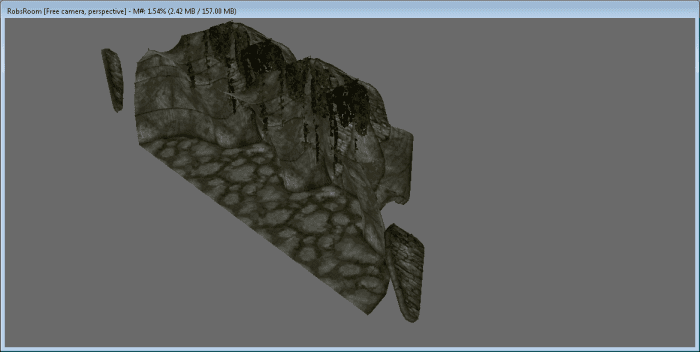
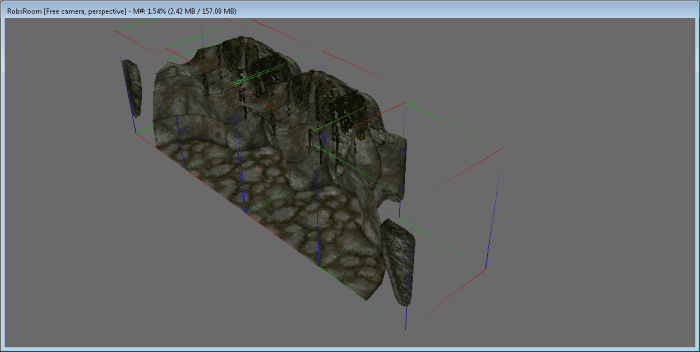
The completed room, created using the Skyrim Cosmos Kit.
http://robbiecwilson.hubpages.com/
Save and Playtest Your Room
Now that we accept created a bones room, it is time to save information technology and playtest it.
- Click on File and and so cull Save
- Give your new mod a proper noun
- Before leaving the Creation Kit, annotation down what you called your modernistic in the Jail cell View window. You volition use this in-game when testing
- Launch Skyrim and click on Data and enable your new mod, then click OK
One time Skyrim is open:
- Click on the Tilde key (commonly under the escape key) and the panel will open up.
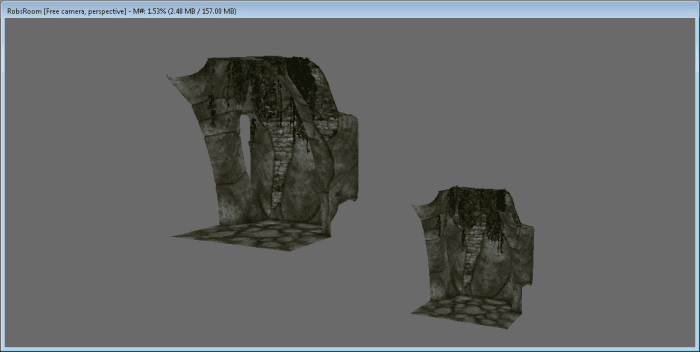
- Type in "coc" followed past the proper name you gave your modernistic in the Cell View window. My modern is called Robsroom, and so I typed in "coc Robsroom".
"Coc stands" for "centre on cell", in instance y'all were curious! At present we take created our offset mod, go alee and wander effectually your new room, checking for any seams or graphical glitches that you will demand to set. In one case yous are happy with your room quit Skyrim and relish having finished your very first simple mod!
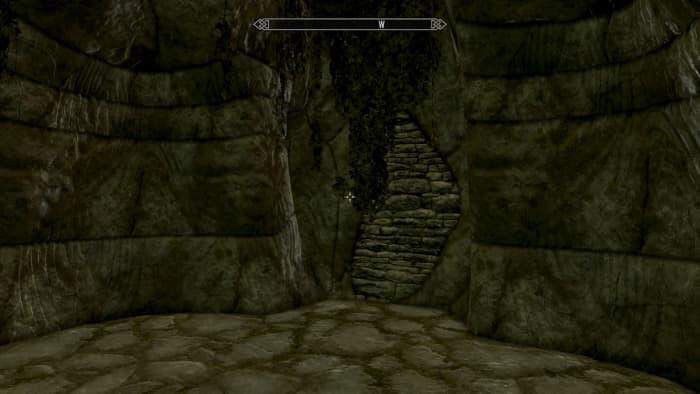
An in-game picture of our room, created using the Skyrim Cosmos Kit.
Zenimax and Bethesda
Happy Modding!
In this article, I have covered the very basics of using the Skyrim Creation Kit. As a learner myself, I plant that the videos and tutorials I was following skipped as well quickly past the very basics. In that location are a number of small hurdles you need to get over to be able to efficiently employ and enjoy the kit. These are:
- Moving around the Render Window
- Placing new objects in the Render Window so that they can be connected to existing objects apace and easily
One time we have a familiarity with both of these concepts, we looked at the diverse windows that make up the Creation Kit:
The Creation Kit itself, with the menus and buttons y'all will need to use to create mods
- Objects are listed in categories in the Object Window
- Cells are listed in the Prison cell Window
- Your mod is shown in 3D in the Render Window
Finally, we created a small Nordic room and tested it in-game to ensure that we had created a perfectly formed room. I promise that you enjoyed this article and information technology has helped y'all to better sympathize the Creation Kit. It is a very powerful tool, if you await at Skyrim Nexus Mods and check out some of the wonderful mods created using information technology, you can see merely how far this tool tin can take yous.
Thanks for reading and happy modding!
© 2015 Robbie C Wilson
rbc on Apr 24, 2020:
I institute the creation kit just fine on Steam. On the library tab at that place is a drop downwardly that says games click in that location to add the tools.
Not Dan on April 23, 2020:
Sure dan. Information technology would require hiring voice actors, if you want voiced dialogue. Otherwise, fifty-fifty for those like us who accept no real modding experience, it'southward possible. It would take years of class, only by the end you'd be a height notch modder!
33261236 on April 08, 2020:
Skyrim Creation Kit is no longer bachelor on Steam!
It'southward available on Bethesda's Launcher, which y'all tin go from Bethesda.cyberspace.
Please edit this in your post to save frustration of others, thanks!
dan on May 14, 2019:
is at that place a manner to edit and rewrite the original story?
Drofrehter on Apr 16, 2019:
I desire to make a mod where y'all can make people naked that is what.
Lavazza on March 04, 2019:
Hey (:
Your description is awesome and helped me a lot. Just tried it for the beginning time simply if I drag the ImpRoomWall01 into the Render Window information technology does not show whatever texture for some reason. Its simply black, do y'all know what I can do?
Ovenstent on August 07, 2018:
Hi, thanks for this very clear tutorial !
At the end you said that the command is coc + proper name of the plug-in, just is information technology non coc + name of the cell ? The first didn't work for me, while the second worked perfectly ;)
Thanks again !
Source: https://levelskip.com/rpgs/Beginners-guide-to-creating-Skyrim-mods-using-the-Skyrim-Creation-kit
Postar um comentário for "Skyrim Se Creation Kit How to Upload Mod to Bethesda.net Only for Yourself"